.svg)
.webp)


.svg)
Thinking about ripping up that old laminate floor? You're in for some good news: removing laminate flooring is much easier than installing it in the first place. Whether you're upgrading to hardwood, switching to tile, or just tired of that outdated pattern, this comprehensive guide will walk you through the entire process step by step.
Taking up laminate flooring doesn't have to be a daunting task — it's actually simpler than putting it down. As experienced laminate floor installers, this guide covers everything from step-by-step removal techniques to creative reuse ideas and essential tips for success. We'll show you how to handle both click-lock floating floors and those stubborn older glued-down installations.
Before You Begin: What You Need to Know
Smart preparation makes all the difference between a smooth project and a frustrating afternoon. Understanding your specific flooring type and gathering the right tools will save you time, money, and potential headaches down the road.
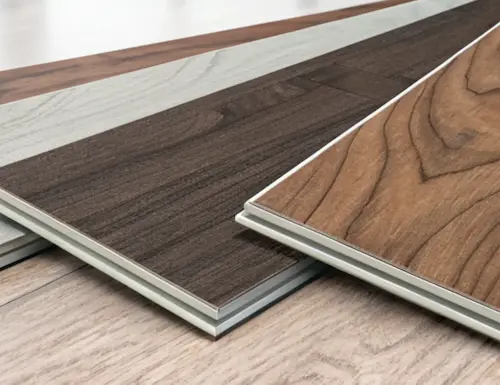
Know Your Flooring First: Floating vs Glued

Floating floors are the most common type of laminate installation today. They use a click-lock system, which allows planks to interlock and sit freely over an underlayment. These planks are easier to remove and can often be reused — if you're careful not to damage the locking mechanism.
Glued-down floors, on the other hand, are trickier. These installations use adhesive to fix the boards either to each other or directly to the subfloor. You'll know you have glued flooring if the planks don't lift easily or if you see adhesive residue when you try to remove a piece.
Tools and Materials Needed
Having the right equipment makes removing laminate flooring much more efficient and safer. Here's what you'll need for most projects:
- Pry bar: Used to lift trim, baseboards, and flooring planks.
- Utility knife: For scoring paint lines and cutting underlayment or tape.
- Pliers: Helpful for removing nails and stubborn fasteners.
- Screwdriver: For removing any metal track mounts under transition strips.
- Wet/dry vacuum: To clean the subfloor after removal.
- Heat gun: Necessary for softening adhesive on glued installations.
- Floor scraper: Removes stubborn adhesive residue from subfloors.
- Adhesive remover: Chemical solution for tough glue cleanup.
Safety Considerations
Always prioritize safety during any demolition project. Laminate flooring can have sharp edges and may release harmful particles during removal. Wear appropriate gear during the material removal:
- Gloves: Prevent cuts from sharp board edges and brad nails.
- Safety glasses: Shield your eyes from flying debris and dust.
- Dust mask or respirator: Essential when working with adhesives or sanding residues.
- Knee pads or foam kneeling cushion: Keep your knees protected when working on hard floors.
- Closed-toe shoes: Prevent injury from tools or loose nails.
Take your time and work in a well-ventilated area. Safety first — especially if you're doing DIY laminate floor removal.
How to Remove Laminate Flooring Step-by-Step
How to remove laminate flooring? Follow these steps to efficiently remove a floating laminate floor and prepare your subfloor for new flooring.
Step 1: Plan and Prepare
Proper planning is essential for a successful project. Whether you plan to discard or reuse the laminate, clear the furniture from the space beforehand, this not only facilitates the removal but also creates a safer work environment.
Step 2: Remove the Transition Strips and the Trim
Carefully use a pry bar to remove transition strips between rooms or different flooring materials. To remove the trim, score the seam between the baseboard and quarter round, then use a pry bar to detach the quarter round. Repeat the process for the baseboard if the laminate extends beneath it.
Step 3: Pull the First Row

Start at the most accessible corner of the room. Lift the lip of the first row to a 45-degree angle and pop it out of the second row, following the manufacturer's instructions for your specific locking system. Use a pry bar if necessary, but work gently if you're planning to reuse the planks.
Step 4: Remove Remaining Rows
Continue removing each row of planks, moving in the reverse order of how they were installed. Gently tilt each board back and forth — between 30 to 45 degrees — until the locking system releases. Create neat stacks as you progress for easier cleanup. This method helps keep everything organized and protects planks from damage.
Step 5: Handle Stubborn or Damaged Sections
Some boards may resist removal or have tight joints. Use a tapping block or carefully wiggle them loose. If you're reusing the material, you can apply wood glue to small damaged spots. It's okay if a few boards break, just aim to minimize waste.
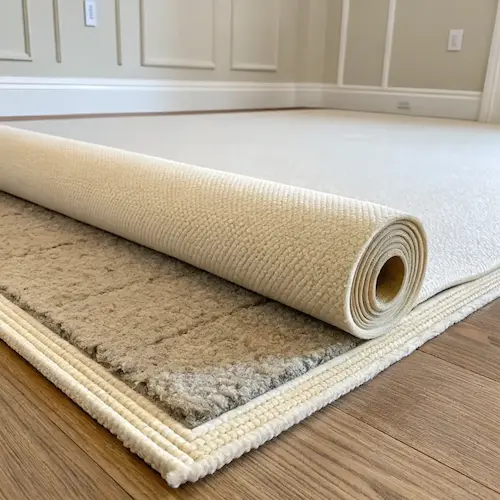
Step 6: Roll Up Underlayment (Optional)
If your flooring has a foam underlayment, roll it up and discard it. Some products come with attached padding, in which case there’s no extra layer to lift.
Step 7: Clean Up the Subfloor
Use a wet/dry vac to remove debris from the subfloor. Check for any remaining adhesive, staples, or nails that need removal. This is also an excellent time to inspect your subfloor for any damage that might need repair before installing your new flooring.
How to Remove Glued-Down Laminate Flooring
While most laminate flooring is installed as a floating floor, some may be glued down. These installations are less common but significantly more challenging to remove.
When removing glued laminate flooring, you'll need a heat gun to soften the adhesive and a floor scraper to work the planks free. Start in one corner and apply heat in small sections, then immediately scrape while the adhesive is warm. This process takes much longer and requires more physical effort than removing floating floors.
Keep in mind: Glued-down laminate flooring cannot be reused due to adhesive damage and the aggressive removal process required.
Reusing Laminate Flooring
Successfully reusing laminate flooring can save money on smaller projects like closets, laundry rooms, or workshops. However, this only works with floating floor installations where the tongue and groove edges remain intact. During removal, treat each plank like it's fragile glass. Gently tilt, lift, and never force anything. Damaging just one locking edge can make a whole section unusable.
Handle each plank carefully during removal, protecting the locking mechanisms from damage. Store planks flat and in a dry location until you're ready to reinstall. Keep in mind that matching old laminate styles is nearly impossible, so reuse works best for spaces where a perfect match isn't critical.
Pro tip from a seasoned Redditor: In heat-prone areas like fireplaces or sunny windows, apply a bit of glue to the tongue-and-groove joints when reinstalling. It helps prevent shifting and keeps the floor from popping up.
When to Call a Professional

If you're searching for how to remove laminate flooring, chances are you're planning to install something new in its place — tile, hardwood, or updated laminate. But turning that vision into reality often requires more than just a pry bar and patience. Here’s when it’s smart to bring in the pros:
- Glued-down flooring: Tough adhesives can be hard to remove cleanly without the right tools.
- Subfloor concerns: Soft spots, damage, or moisture issues need expert attention before new flooring goes in.
- Limited time: Tight schedule? Pros can complete the job quickly and efficiently.
- Back-to-back install: If new flooring is going in right after removal, let a pro handle the full transition.
Investing in expert help doesn’t just save time — it safeguards your future floor and helps you avoid costly installation mistakes. And that peace of mind? Worth every penny.
One Step Closer to a Beautiful New Floor
Whether you're removing old flooring or planning a complete upgrade, the process requires careful attention to detail and proper technique. Understanding the various reasons for removal — from wear and damage to style updates — helps ensure you choose the right approach for your specific situation.
At Simple Flooring, we specialize in laminate flooring installation in Chicago. From expertly removing your existing flooring to new flooring installation, we offer convenient and efficient solutions for all flooring needs.
Contact us today to discuss your project and make the transition to a beautiful new floor!


